Preparing to grill your favorite steak or barbecue is a very important part of your journey to getting a perfectly cooked, tasty treat. Hence, it’s important to get it right when setting up your grill, right up to the time you light your charcoal.
I will be showing you steps on how you can do this effectively to get the best results.
How do I light up my charcoal using lighter fluid?
Taking this precaution is especially crucial before utilizing a public grill, as you wouldn’t want any leftover debris to end up in your meal. Don’t be fooled into thinking that the residual fat and food particles would improve the flavor of your food; instead, they’ll merely make your food cling to the grill and bathe it in ash.
Use a wire brush with some bite to scrape away the ash and residue left behind by the previous user.
After you’re done grilling, make sure to clean the grates thoroughly while the iron is still warm and the debris is loose. Wait until the charcoal is blazing and the barbecue rack has been reinstalled before attempting to remove anything that just won’t budge. We expect that the heat will melt the muck.
Take the grates out of the grill and crack the windows.
Vents can be found on the underside of your grill. Throw them open. It’s as easy as saying it. The ash at the base of the grill must be removed completely. After lighting the coals, you can keep them going by opening the air vents.
Set the charcoal briquettes in a fire pit.
It’s time to flaunt your expertise in pyramid construction. Place the briquettes inside the grill, then continue piling them higher and higher until they form a conical or pyramid shape inside the grill, with the pointiest end in the middle.
Put on some lighter fluid.
Lighter fluid should be sprayed in a circular manner from the top briquettes outward until they are completely covered. Oversoaking is bad, but too little can leave you without enough fuel to get your charcoal going. Waiting the full five minutes will let the liquid fully absorb into the coals.
Get the fire going.
If you want the heat to be distributed evenly, you should light the base of the charcoal pyramid in a few different places using long matches or a barbeque lighter. Twenty to thirty minutes is about how long it will take to heat up completely. A gradual decrease in the coals’ heat output will occur after their initial rapid combustion. The coals are lit, even if they don’t appear to be. Just be patient.
Toss the glowing charcoal around.
Once the majority of the coals have been covered in white ash, you can go ahead and smash your coal pyramid with tongs to make a bed of coals across your grate. Clean the grate of any stubborn debris that has been clinging to it since you first installed it.
What are some grilling habits to avoid?
Purchasing a cheap grill
Everyone has a set amount of money they can spend, but if you can, investing in a good barbecue is money well spent. The quality of the grill will increase, as will the length of the warranty. Manufacturer warranties typically cover damage to a grill from everyday use. If you want to make a smart purchase selection, you shouldn’t look at the sticker price of each grill. Instead, consider the grill’s warranty duration as a fraction of the total cost.
Disregarding grilling zones
Having several areas where you can cook over both indirect and direct heat is a major benefit of using a grill. Several common cooking zone configurations exist, with a two-zone setup being the simplest. To do this, simply light one side of a gas grill and keep the other side lit at a low temperature or off. However, if you’re using charcoal or wood for your grill, you should only fill half of it.
Not monitoring the temperature of the meat
Although a meat thermometer is not typically used in the kitchen, it is highly recommended that one be used when cooking meat on the grill. To begin, for the most effective and consistent cooking, you should leave the grill lid closed as much as possible. When you use a meat thermometer, you can tell when the meat is done cooking without having to keep checking on it. Second, you can usually count on having company while grilling. Having a meat thermometer on hand is an easy way to monitor cooking and make sure your meat is thoroughly done every time.
Starting with a grimy grill
Cleaning and re-oiling the grill’s grates after each use is a must. Grills need an annual (or more often) thorough cleaning. The pursuit of perfection is not represented here. A well-cleaned grill improves both the cooking experience and the ultimate product. Without regular cleaning, charred pieces stick to and pile on grill grates, making it harder to turn food and imparting an unpleasant, burnt taste.
Applying the barbecue sauce too early
Beware: not all barbecue sauces can be used as marinades. They’re both made with comparable components, but sauces are typically used to coat the exterior of whatever they’re applied to and have a higher sugar level as a result. When grilled over direct heat, sugar quickly caramelizes, causing the exterior to burn even before the interior is fully cooked. Make use of a rub or low-sugar marinade instead before firing up the grill. Grilled items should be transferred to an indirect heat zone for the final 10–15 minutes of cooking before being hit with sauce.
.
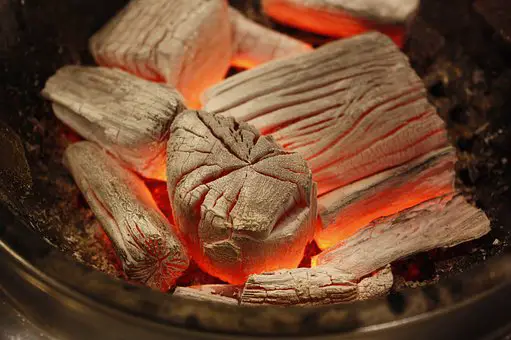
How can you tell when the coals are ready?
When your charcoals are completely covered in gray ash, they are done.
The fluid will burn out, leaving gray margins around the embers. The ash gradually coats each briquet of coal as the fire progresses. Once the coals have been buried in ash for the most part, they can be used. The whole thing will only take you approximately 15 minutes.
How can I tell how hot the fire is?
There is a simple way to gauge the temperature of your fire even if you don’t have a thermometer. Just raise your palm about 10 to 15 centimeters above the flame.
For as long as you can keep it there,
It’s hot for 2–4 seconds, around 400–500 degrees Fahrenheit.
If it takes more than ten seconds to reach a moderate temperature, more coal should be added.
What are some other charcoal grill starter alternatives?
Chimney Starter, Weber 7447 Compact Rapid Fire
Chimney lighting is the standard technique for charcoal. This tiny chimney starter can fire coals in just 15 minutes, making it ideal for camping trips. It works best with lighter cubes, but you may use anything that will catch fire as a starting point. It’s a cheap and easy technique to get the coals nice and hot before you fire up the grill.
This size is wonderful for a cozy fire and a four-person dinner because it can hold about 40 briquettes. A larger chimney can be purchased if a full-sized grill is being used. Users have commented favorably on the fact that the grip remains comfortable even after extended use.
Light-A-Fire Organic Fire-Starters
If you’re looking for an eco-friendly fire starter, these pods are your best bet. These waterproof fire starters are made of pinewood shavings and wax, so you can use them anywhere you might need a fire without worrying about any noxious fumes or odors. They have no discernible scent or flavor, and each pod burns for around 20 minutes.
These convenient capsules are a perfect alternative to using lighter fluid or other electrical equipment. These fire starters have no need for kindling, so there’s no need to use up your newspaper or other paper supplies. As a result, they produce little amounts of ash.
Fire Starter Squares with Bangerz and Sunz
You can easily start a fire with these eco-friendly cubes. Using lighter fluid might be unnecessary because of the use of recovered wood chips and wax. They can burn for around ten minutes and are resistant to the elements. There is no cause for alarm about a recurrence. Not only are these easier to keep burning and clean, but they also don’t need kindling or paper to get started.
These can be used indoors as well, so feel free to light a fire in your fireplace. The ease with which it can start a fire, even in severely moist conditions, has impressed reviewers. It’s on the pricier side of starters, but it works well, is dependable, and will heat your coals before the flame goes out.
Electric Charcoal Fire Starter by MIGI WOLF
With this electric fire starter, you can quickly heat up your coals without resorting to kindling. For your protection, the outer shell soon cools down, and the ignition requires the depressing of a button. The handle is strong and won’t fall out of your hand, making it ideal for starting fires. The length of the lighter is 18 inches, and it weighs next to nothing. There are no means of keeping the flame going, and no lighter fluid or matches are allowed.
How to light charcoal with lighter fluid
Preparing to grill your favorite steak or barbecue is a very important part of your journey to getting a perfectly cooked, tasty treat. Hence, it’s important to get it right when setting up your grill, right up to the time you light your charcoal.
I will be showing you steps on how you can do this effectively to get the best results.
How do I light up my charcoal using lighter fluid?
Taking this precaution is especially crucial before utilizing a public grill, as you wouldn’t want any leftover debris to end up in your meal. Don’t be fooled into thinking that the residual fat and food particles would improve the flavor of your food; instead, they’ll merely make your food cling to the grill and bathe it in ash.
Use a wire brush with some bite to scrape away the ash and residue left behind by the previous user.
After you’re done grilling, make sure to clean the grates thoroughly while the iron is still warm and the debris is loose. Wait until the charcoal is blazing and the barbecue rack has been reinstalled before attempting to remove anything that just won’t budge. We expect that the heat will melt the muck.
Take the grates out of the grill and crack the windows.
Vents can be found on the underside of your grill. Throw them open. It’s as easy as saying it. The ash at the base of the grill must be removed completely. After lighting the coals, you can keep them going by opening the air vents.
Set the charcoal briquettes in a fire pit.
It’s time to flaunt your expertise in pyramid construction. Place the briquettes inside the grill, then continue piling them higher and higher until they form a conical or pyramid shape inside the grill, with the pointiest end in the middle.
Put on some lighter fluid.
Lighter fluid should be sprayed in a circular manner from the top briquettes outward until they are completely covered. Oversoaking is bad, but too little can leave you without enough fuel to get your charcoal going. Waiting the full five minutes will let the liquid fully absorb into the coals.
Get the fire going.
If you want the heat to be distributed evenly, you should light the base of the charcoal pyramid in a few different places using long matches or a barbeque lighter. Twenty to thirty minutes is about how long it will take to heat up completely. A gradual decrease in the coals’ heat output will occur after their initial rapid combustion. The coals are lit, even if they don’t appear to be. Just be patient.
Toss the glowing charcoal around.
Once the majority of the coals have been covered in white ash, you can go ahead and smash your coal pyramid with tongs to make a bed of coals across your grate. Clean the grate of any stubborn debris that has been clinging to it since you first installed it.
What are some grilling habits to avoid?
Purchasing a cheap grill
Everyone has a set amount of money they can spend, but if you can, investing in a good barbecue is money well spent. The quality of the grill will increase, as will the length of the warranty. Manufacturer warranties typically cover damage to a grill from everyday use. If you want to make a smart purchase selection, you shouldn’t look at the sticker price of each grill. Instead, consider the grill’s warranty duration as a fraction of the total cost.
Disregarding grilling zones
Having several areas where you can cook over both indirect and direct heat is a major benefit of using a grill. Several common cooking zone configurations exist, with a two-zone setup being the simplest. To do this, simply light one side of a gas grill and keep the other side lit at a low temperature or off. However, if you’re using charcoal or wood for your grill, you should only fill half of it.
Not monitoring the temperature of the meat
Although a meat thermometer is not typically used in the kitchen, it is highly recommended that one be used when cooking meat on the grill. To begin, for the most effective and consistent cooking, you should leave the grill lid closed as much as possible. When you use a meat thermometer, you can tell when the meat is done cooking without having to keep checking on it. Second, you can usually count on having company while grilling. Having a meat thermometer on hand is an easy way to monitor cooking and make sure your meat is thoroughly done every time.
Starting with a grimy grill
Cleaning and re-oiling the grill’s grates after each use is a must. Grills need an annual (or more often) thorough cleaning. The pursuit of perfection is not represented here. A well-cleaned grill improves both the cooking experience and the ultimate product. Without regular cleaning, charred pieces stick to and pile on grill grates, making it harder to turn food and imparting an unpleasant, burnt taste.
Applying the barbecue sauce too early
Beware: not all barbecue sauces can be used as marinades. They’re both made with comparable components, but sauces are typically used to coat the exterior of whatever they’re applied to and have a higher sugar level as a result. When grilled over direct heat, sugar quickly caramelizes, causing the exterior to burn even before the interior is fully cooked. Make use of a rub or low-sugar marinade instead before firing up the grill. Grilled items should be transferred to an indirect heat zone for the final 10–15 minutes of cooking before being hit with sauce.
.
How can you tell when the coals are ready?
When your charcoals are completely covered in gray ash, they are done.
The fluid will burn out, leaving gray margins around the embers. The ash gradually coats each briquet of coal as the fire progresses. Once the coals have been buried in ash for the most part, they can be used. The whole thing will only take you approximately 15 minutes.
How can I tell how hot the fire is?
There is a simple way to gauge the temperature of your fire even if you don’t have a thermometer. Just raise your palm about 10 to 15 centimeters above the flame.
For as long as you can keep it there,
It’s hot for 2–4 seconds, around 400–500 degrees Fahrenheit.
If it takes more than ten seconds to reach a moderate temperature, more coal should be added.
What are some other charcoal grill starter alternatives?
Chimney Starter, Weber 7447 Compact Rapid Fire
Chimney lighting is the standard technique for charcoal. This tiny chimney starter can fire coals in just 15 minutes, making it ideal for camping trips. It works best with lighter cubes, but you may use anything that will catch fire as a starting point. It’s a cheap and easy technique to get the coals nice and hot before you fire up the grill.
This size is wonderful for a cozy fire and a four-person dinner because it can hold about 40 briquettes. A larger chimney can be purchased if a full-sized grill is being used. Users have commented favorably on the fact that the grip remains comfortable even after extended use.
Light-A-Fire Organic Fire-Starters
If you’re looking for an eco-friendly fire starter, these pods are your best bet. These waterproof fire starters are made of pinewood shavings and wax, so you can use them anywhere you might need a fire without worrying about any noxious fumes or odors. They have no discernible scent or flavor, and each pod burns for around 20 minutes.
These convenient capsules are a perfect alternative to using lighter fluid or other electrical equipment. These fire starters have no need for kindling, so there’s no need to use up your newspaper or other paper supplies. As a result, they produce little amounts of ash.
Fire Starter Squares with Bangerz and Sunz
You can easily start a fire with these eco-friendly cubes. Using lighter fluid might be unnecessary because of the use of recovered wood chips and wax. They can burn for around ten minutes and are resistant to the elements. There is no cause for alarm about a recurrence. Not only are these easier to keep burning and clean, but they also don’t need kindling or paper to get started.
These can be used indoors as well, so feel free to light a fire in your fireplace. The ease with which it can start a fire, even in severely moist conditions, has impressed reviewers. It’s on the pricier side of starters, but it works well, is dependable, and will heat your coals before the flame goes out.
Electric Charcoal Fire Starter by MIGI WOLF
With this electric fire starter, you can quickly heat up your coals without resorting to kindling. For your protection, the outer shell soon cools down, and the ignition requires the depressing of a button. The handle is strong and won’t fall out of your hand, making it ideal for starting fires. The length of the lighter is 18 inches, and it weighs next to nothing. There are no means of keeping the flame going, and no lighter fluid or matches are allowed.